It’s a Win-Win (Part II) – Blueberry Drop Biscuit Cobbler

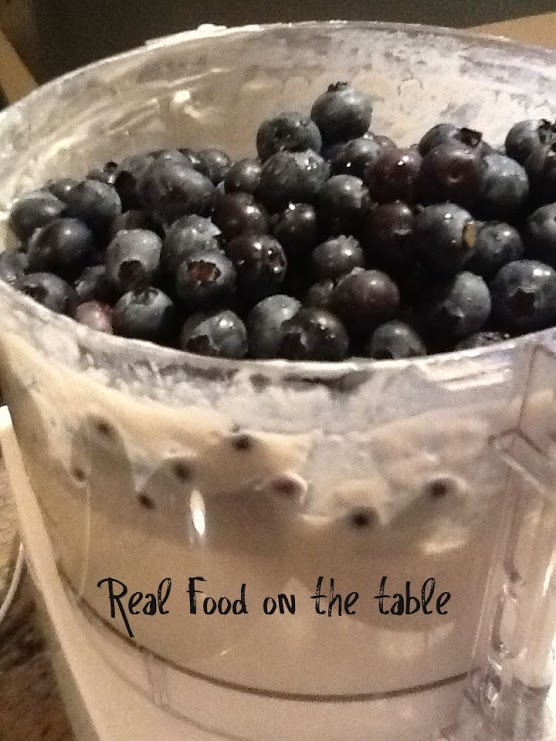
One thing I failed to mention in Part I of It’s a Win-Win, is that I really wasn’t a blueberry fan prior to finding Temecula Berry Company. I always adored  McCloskey’s book, Blueberries for Sal – a family favorite in our house, but the fruit itself didn’t hold much appeal for me. I would eat them occasionally in fruit salads and when they were served by others, but I never bought them.  To me they were generally tasteless.  Well let me tell you, eating directly off the bush is a whole different experience.  They are just so flavorful – almost like a completely different fruit to me.

So if you haven’t ever gone blueberry picking, I really recommend it.  Here’s a handy little site that can help you locate places to pick berries as well as various other fruits and veggies – http://pickyourown.org/

Our No Bake Blueberry Cheesecake wiped out about half of our take in the picking.  That doesn’t account for all of the random munching – of which there was A LOT.  So with the other half we just had to go for a classic cobbler.

We did one with a drop biscuit crust and so started off by whisking together some flour, sugar, baking powder and salt.  Then we mixed in butter with our fingers until little lumps formed. Finally, we mixed in sour cream being super careful not to over mix.

cobblerdough

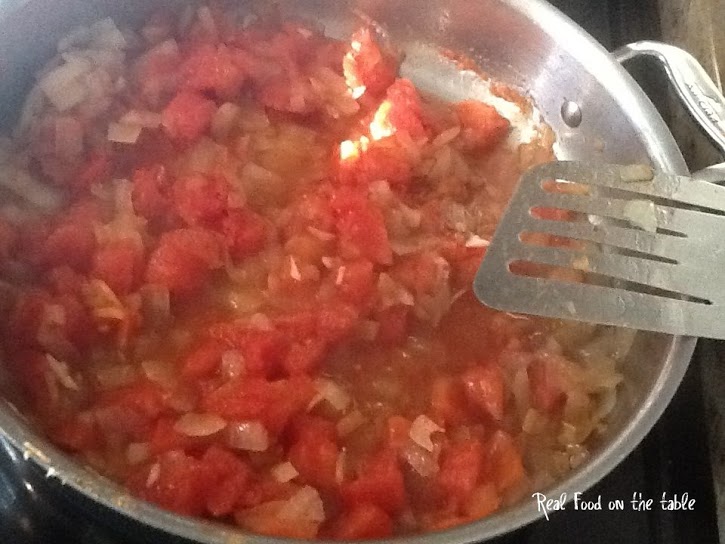
We sat the dough aside and got to work on the filling.  Super simple, really.  We just mixed the berries with sugar, a little flour, some lemon zest, and a bit lemon juice.

cobblerfilling

Once the filling was mixed, we spread it into the bottom of our dish, and then dropped the biscuit topping, by quarter-sized pieces, all over the top.  Nothing fancy at all.

cobblerraw

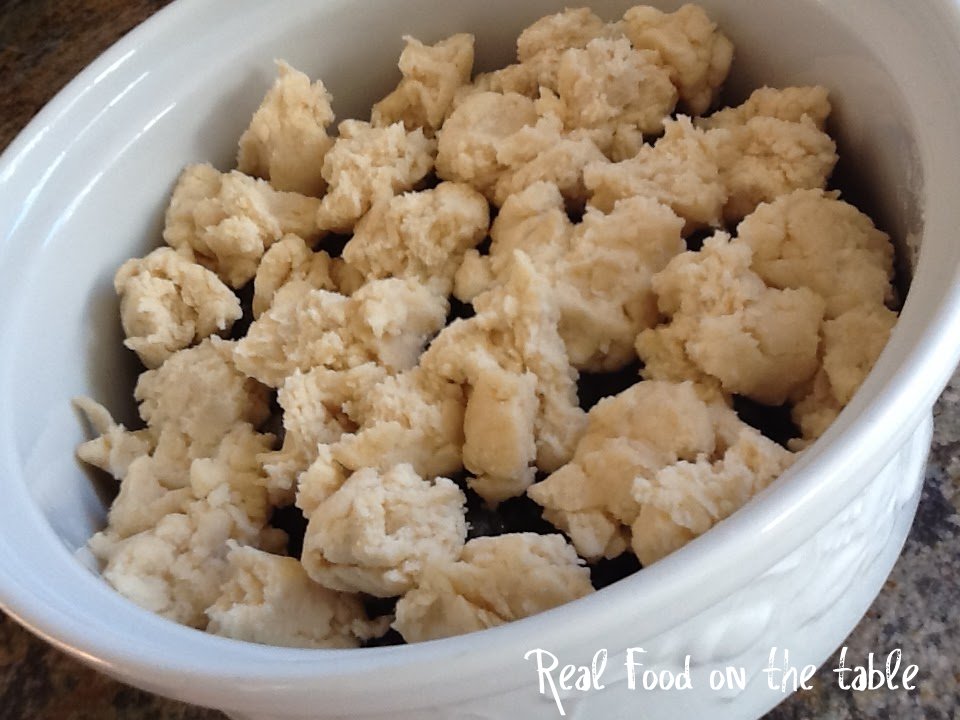
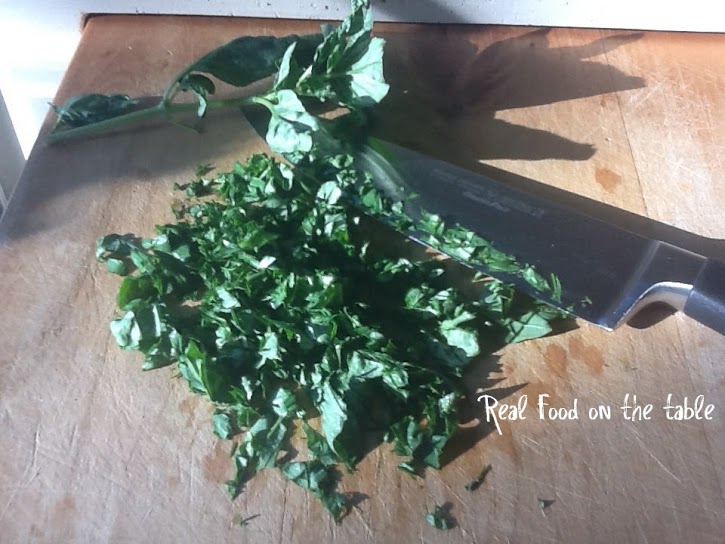
Doesn’t it kind of look like cauliflower?

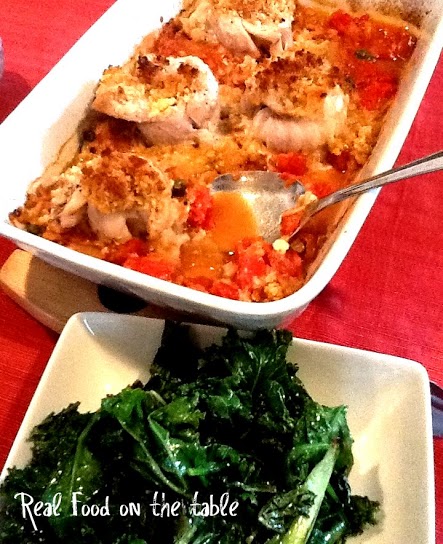
The whole thing baked for about 50 minutes, until it was golden brown on top, and then we let it cool for about an hour.  Of course, we had to eat it a la mode.  I mean it would have been a total cobbler travesty to have eaten it any other way.

cobblerfinal

And that, dear friends, completely finished off the fruits of our picking.

Here’s the recipe for Blueberry Drop Biscuit Cobbler if you want to give it a go.

Recipe adapted from Epicurious

It’s a Win-Win (Part I) – No Bake Blueberry Cheesecake

I spend a significant amount of time doing things that I’m not exactly dying to do.  This always seems to astonish my children.  I think they actually believe that I’m INTO  driving back and forth to Water Polo and Soccer.  They are convinced that I get a real kick out of washing and folding laundry and loading and unloading the dishwasher.  Just last week, I was at a fundraiser at Pump It Up with four of my small people.  I finally said to the mom next to me, “Is it just me or are the hands on that clock simply not moving?”  Thankfully, she was down with my sentiment and didn’t look at me as though I were the worst mother on the face of the planet. So yes, the things that fill my days aren’t always high ranking on my dream roster or bucket list. A season for everything, right?

Now granted, I have made the choices leading me to where I am.  I recognize that and accept that.  I am not complaining, just being honest, folks.  I refuse to believe that even the most saintly of mothers jumps with joy over the prospect of, say, reading The Little Red Hen for the 42nd time in one morning or going to the library on the third Wednesday of the month for Read to Rover (yes, sitting and watching as your child reads to Guide Dogs.  Dogs.  I repeat – reading to dogs. Point made).  So you can easily understand, I hope, what a treat it is, when THEIR entertainment and enrichment can cozy up with any of MY passions.

Thus, my pure enthusiasm over heading out to go blueberry picking this past week.  They were exuberant at the thought of picking berries, and with friends at that.  I was looking forward to spending time with friends, but my wheels were already turning as to what we would make with so may fresh picked blueberries.  We headed for Temecula Berry Comany, a little blueberry farm that the fam and I discovered about four years ago.  We’ve made an annual pilgrimage there every year since.

berrypicking

Altogether, we picked 8 pints of berries.  Not too shabby, but I’m always astonished at how quickly they disappear.

We were invited to a friend’s house for dinner over the weekend and so of course I felt compelled to take a blueberry dessert.  Specifically, a No-Bake Blueberry Cheesecake.

I started by tossing together some graham crackers, brown sugar, rolled oats, and salt for the crust.  I mixed it in the food processor until fine crumbs were formed.

berrycheesecakecrust

After that, I mixed in melted butter and vanilla with the processor running until evenly moist crumbs were formed.  Then I pressed it into the bottom and up the sides of a springform pan.

berrycheeseckecrustpan

I baked the crust at 350 degrees for about 10 minutes until it was golden brown.

While the crust was baking, I sprinkled some unflavored gelatin over a bit of water and let it sit for about 10 minutes.

berrycheesecakegelatin

I then heated it over low heat until all of the gelatin was dissolved.

In the food processor, once again, I combined some cream cheese, whipping cream, sugar, and lemon juice and blended until it was smooth. Then I added a bunch o’ berries and blended again.

berrycheesecakeprocessor

I slowly added the dissolved gelatin mixture with the processor running and mixed until everything was well blended.

I poured the filling into the crust and sent it off to chill.  I actually left it in the fridge overnight, just because I had enough time to do that and because the flavors blend so much better the longer they set.

berrycheesecakeinpan

The next day, I beat some cream and sugar into stiff peaks.

berrycheesecakecream

I spread the cream over the filling, and then topped all of that with more blueberries tossed with some melted blueberry jam.  Another few hours in the fridge and our blueberry treat was ready for prime time.

berrycheesecakefinal

Now that’s what I call harmony – kids were entertained, food was gathered, and dessert resulted.  If you are a blueberry lover, stay tuned.  Next post on the way  . . . Blueberry Drop Biscuit Cobbler.

Want the recipe for No Bake Blueberry Cheesecake?  It’s here.

Recipe from Epicurious.

In a real blueberry mood?  Check out these other great blueberry recipes.

School’s Out for Summer – Orzo with Grilled Shrimp, Summer Veggies & Pesto Vinaigrette

I think I’m starting to decompress.  I think I’m starting to decompress.  If I repeat that another dozen times, maybe I’ll start to believe it.  About 4 million things have fallen off of my schedule in the last few weeks – with the biggest one being school.  Yes, I homeschool my children and yes, it’s insane.  But the implications of that on the cooking front is that I’m always trying to wedge dinner preparations into everything else I’ve got going on during the day.  Keeping all of the plates spinning is my boiled down job description.  And no, I won’t bore you with the names of each and every plate.  Just trust me when I say, “There are  A LOT of them!”

But with school finished for the year, I can take a more leisurely approach to things in my kitchen.  I love that.  I know for some people cooking is such a hassle, but for me it really is therapeutic.  I’ll take zesting a good lemon over journaling my innermost feelings any day.  Body combat workout to release my aggressions?  I’d rather beat egg whites into stiff peaks.  If I have the time, I like to linger over the steps of putting a meal together and not rush through things.  That’s exactly what I did in assembling this summer salad.

I started by making a nice pot of orzo, draining, rinsing, tossing with a little olive oil and setting it aside.  I truly think orzo is one of my favorite pastas.  There’s something about the size and the texture that just works for me.

shrimp orzo1

Then I chopped up some red bell pepper and summer squash.

shrimp1

I whisked together a little olive oil and red wine vinegar and brushed the veggies with the mixture.

shrimpveg2

Finally, I grilled the veggies until they were just browned and then set aside.  Yes, this was the inaugural busting out of the grill for the summer.

shrimpveg4

While the veggies were grilling, I had the peeled and deveined shrimp sitting in a little marinade of prepared pesto, lime juice, olive oil, and red wine vinegar.  As soon as the veggies came off the grill, on went the shrimp.  I grilled them for about 3 minutes per side and then pulled them off.  Actually, Medium Little One handled the grilling for me and did quite a fine job at it.

shrimpgrill1

I chopped up some grape tomatoes and fresh basil (we are OVERRUN with basil, so if you find all recipes for the next 3 months oozing with basil, it’s not my fault it’s the garden’s), and then cubed some fresh mozzarella.  I tossed this all together with the orzo, the grilled veggies and the grilled shrimp and then poured my remaining pesto vinaigrette over.

shrimpsalad1

I served it with some sweet potato fries and we were good to go.

shrimpsaladtable1

So welcome summer!  I am so glad you are here.  No I won’t be grading anymore Singapore Math, nor will I be measuring soil compaction with knitting needles for Science Fair projects.  I will not be be nagging to complete your DOL, nor will I explain rotational symmetry for the 98th time.  I don’t care if you don’t know whether the pronoun is a subject pronoun or an object pronoun, and if you can’t remember to find a common denominator before comparing fractions, then that’s just your own problem for the next three months.  I’ll be lingering over summer recipes in my kitchen and sipping white wine while doing it.

For the complete Orzo with Grilled Shrimp Summer Veggies & Pesto Vinaigrette Recipe, click here.

Want to explore some more fun Orzo Recipes?

Related articles

Food Stereotypes – Lentil & Mixed Veggie Salad

Ever find yourself stereotyping people based on the way they talk, where they come from, or the way they dress?  I find myself stereotyping food.  For lots of foods I can embrace their versatility and have fun experimenting with them in different culinary contexts.  Then there are other foods that just stay stuck in a very specific place for me.  Enter – my friend, the lentil.  In my small, little mind, if you are a lentil you are a) being eaten in a nice Indian dish or b) being consumed in some bland, tasteless way by an individual wearing Birkenstocks and reading Walden.  How sad is it that I have limited the lentil in this way?

This poor legume has never done a thing to me and yet in all my years of cooking, I can honestly say that the only time I have put it on the table was in Amy’s canned lentil soup and in one of those heat in the bag, Indian deals – – – and then that was usually only to feed my kids, not myself. And yet, to read about it, the lentil doesn’t have a bad rap at all.  One serving of lentils contains 18g of protein and only 1g of fat. Great source of iron, with one serving chalking up 37% of the daily recommended intake. And on and on go the benefits.

So I recently set out to break down this legume barrier and bring the lentil to my table in all the glory it deserves.  My first attempt got great reviews from the family.  I made Sloppy Joe Lentil Lettuce Wraps.  Unfortunately, the pictures I snapped of those little puppies just didn’t do them justice.  I decided I would do the lentil’s already damaged reputation more harm if I were to post those pictures.  Maybe the next time around, I will have better luck in the photo department and then be able to share. So next on my list I tackled a Lentil and Mixed Veggie Salad. (I had also realized that I had sequestered the lentil to only Fall and Winter dishes and couldn’t fathom it in any light summer setting).

In all honesty, I’m not sure the actual lentil part of the salad turned out as it should have.  In fact, I almost aborted after step one of the recipe.  But I stayed the course, and, correct or not, the blending of flavors in this little number and the summer freshness and lightness that it offered were both  pleasant surprises.

I started off by rinsing the lentils.

lentils rinsed

Then, in a saucepan, I combined them with some finely diced garlic and a couple of bay leaves.

lentilsgarlic

I added enough water to just cover the lentils, brought it to a boil, and then reduced the heat and simmered for about 40 minutes.

I drained them (there was basically no liquid left), and set them aside to cool.

While they were cooling, I chopped up some red bell pepper, yellow bell pepper, red onion, kalamata olives, carrots, basil & tomatoes.  I tossed those veggies with the cooled lentils, and then added in a sauce made of red wine vinegar, olive oil, and salt & pepper.

I placed it atop a bed of butter lettuce on a platter and served.

lentil platter

It was a great summer evening meal served with cantaloupe and avocados with walnut fig balsamic dressing along with a fresh baguette.  Filling and yet very light.

lentil fulltable

lentil serving

So I think I have made amends with the lentil.  I took me a while, but I did it.  Next up?  The lima bean – – – then again, maybe it’s good to tackle only one major life change a year.

Here is the complete recipe for Lentil & Mixed Veggie Salad

Why We Don’t Have Cable – Banana Bread French Toast A La Mode

For the longest time, I have hidden behind the facade of doing the right thing for my children.  We do not have cable – haven’t for about the last 4 years.  Sure, I chalk it up to some lofty ideal about screen time and critical thinking and imaginative play.  Right!  The truth of the matter is that we do not have cable because if we did, I think child services would be knocking on my door.  The charge?  Neglect. Specifically, neglect from a mother completely consumed by The Food Network.  I. Am. Not. Joking.

Since we don’t have cable at home and only use our TV for watching DVDs, one of the high points of family getaways is watching TV in the hotel room.  I actually have my offspring bamboozled into thinking The Food Network is better than the Disney channel.  Quite a feat if you ask me.  The Little Little One even refers to a hotel as “The Food Network Place”.

Last weekend we took a little roadtrip up the coast.  I could go on telling you about the elephant seals we saw in Piedras Blancas, the mission in Santa Barbara, the walk along the shore in Cambria, or the sand dollars we collected in Pismo Beach.  But none of that would compare to the episode of the Food Network we saw where one of the Diners, Drive-Ins and Dives that Guy Fieri was visiting cooked up Banana Bread French toast on their dessert menu.  I couldn’t wait to get home and try it.

I started off by just baking my usual banana bread.  Then whisked some eggs just as you would for making regular French toast.

bananabreadegg

I dipped each slice of banana bread into the egg and then added to the butter I had melted in a large skillet.  Once one side was nice and golden brown, I gave it a flip.

bananabreadinpanbananabreadflipped

While all that was going on in one skillet, I put together the sauce in another skillet.  Starting with “a little” butter and brown sugar, I heated it until the sugar dissolved.

bananabreadsauce1

I then added some sliced bananas and cooked until they were starting to soften.

bananabreadsauce2

I put the completed French toast on the plates, topped with some sauce, and then added a couple of scoops of vanilla ice cream.

bananabreadfinal

Three words: To – Die – For!

Click here for the full recipe for Banana Bread.

Breaking Up with Costco – Veggie Dipping Chip & Basil Crusted Halibut

My tendency, since trying to eat “real food”, has been to simply avoid anything that’s not produce, whole grain, or dairy.  As Pollan says in one of his many rules, if you are eating “real”  you can pretty much shop the perimeter of the supermarket and avoid the entire middle.  In other words, the middle of the market is where the junk lurks.

Sticking to the perimeter hasn’t been a tough transition for me, because I’m not a traditional market shopper anyway.  My regular haunt is a little Persian produce place;  I occasionally hit Sprouts, and Trader Joe’s sometimes sneaks into my repertoire (usually when I’m there to buy wine and Ritter Sport).  But, I just can’t seem to fully break it off with Costco.  It’s kind of like trying to break up with a bad boyfriend who just keeps sucking you back in with the promise that things will change.  I mean after all, I do have SIX hungry mouths to feed around here and Costco’s copious sizes are just so attractive to me.  I have definitely noticed a change in the standard Costco fare recently – a lot more food stuff trying to LOOK like it is good for you, or only contains good stuff, or is organic or … or … or.  But overall, I think I’m just better off buying my TP there and then getting out of Dodge.  Kind of like Costco and I can “just be friends” but not really date anymore.

So all of this intro to get to my real confession which is that I dislike reading labels.  I just don’t have the patience to sit there and figure out if what I’m looking at is truly good for me or just more stuff that’s bad for me wearing a thinly veiled disguise.  Another Pollan-ism that I love, mainly because it affirms my dislike of label reading, is that if something contains more than 5 ingredients OR ingredients that a 3rd grader can’t pronounce, then it’s probably a skipper.

However, in my ongoing quest to break up with Costco, I did find a keeper recently.  These little veggie dipping chips.

halibut chips

There are three flavors mixed in the bag: Spinach & Garlic, Beet & Onion, and Carrot & Tomato.  They are REALLY tasty and the whole brood here has been enjoying them with edamame hummus.  Being the non-label reader that I am, I bought them on a whim and then read the label after the fact.  I was pleasantly surprised to find that my 3rd grader (good thing I’ve got one on hand for just this purpose) could pronounce every single ingredient.

As I set out to make dinner the other night, I decided on a little halibut number.  I was working from a recipe for Roasted Halibut with Walnut Crust.  Unfortunately, I had no walnuts, no panko, no italian parsley, and no chives.  Good thing I had the halibut!  In fact, I had no bread products whatsoever in the house, but really wanted to do the fish with a little crust of some sort.  While rummaging through the cupboard in total disbelief that I had no panko, I happened upon the Veggie Dipping Chips and decided to give it a whirl.  Medium Little One’s garden has been producing more basil than I can keep up with so I decided that it would be a Veggie Dipping Chip & Basil Crusted Halibut.  This is basically how it all went down.

Chopped up that lovely basil first.

halibut basil

Crushed up the dipping chips with some slivered almonds in my mini-food processor and then mixed them with the chopped basil.

halibut rub

Placed my halibut on a baking sheet covered with cooking spray.  I brushed each fillet with a little melted butter and then sprinkled with a little salt and pepper.

halibutraw

I then pressed the veggie chip, basil and almond mixture onto the top of each fillet and drizzled with a tiny bit more butter.

halibutwbreading

I baked the whole shabang at 450 degrees for about 8 minutes until the fish was opaque in the center.

I served things up with a little rice and some brussels sprouts with caramelized shallots.

halibut final

Even though this was a complete improv move, I would totally make it this way again.  Oh, and me and Costco have decided to give things one more chance. . .

Want the whole recipe?  Click here.

Mom’s Night Out – Crock Pot Carrot Ginger Soup

Around here, the Mama needs to get out on a regular basis. You know the saying, “If Mama ain’t happy, ain’t nobody happy”, and usually what makes Mama happy is great conversation and great food. My outings typically amount to dinner or cocktails out with friends every couple of weeks. There are my “super foodie” friends who point me to new and delicious restaurants, then there are the “quasi-foodie” friends who usually ask me where we should go, and then there are the “wouldn’t know good food if it fell on your head” friends, and with them it’s just best to opt for cocktails.

There are two total Mom’s Night Out joy killers. The first is coming home to kids who are still awake. Seriously, Hubs? Going through the “I need another kiss, and I have to tell you one more thing, and did you forget to change my band-aid, and I need another drink of water, and I can’t fall asleep without my glow in the dark, sparkly Littlest Petshop unicorn that has been MIA for 7 days now” routine just sucks the pleasure out of any evening out. When I come home, I want to be greeted by silence. Let me spell that out even more clearly. I want the house to be absent of all noise, especially small voices uttering the words “Mom” and “I want”. The second major joy killer is trying to get any kind of complicated meal on the table before rushing out the door.

Over the years, I have had to adapt my definition of “complicated”. Basically, anything involving more than two steps is complicated for the Hubs to pull off. So as my craving for Me Nights Out has increased, so too has my love of the crock pot. 1) Scoop out 2) Plop on plate These are 2 steps that my family can cope with. I don’t get hung up in the doorway giving little last minute reminders and being asked about what to do with such and such. I can just point to the pot and remind them to scoop and plop. Easy.

Last week, I enjoyed a great dinner out at Tender Greens with a friend. That restaurant is really growing on me. As I headed out the door, I pointed my brood to the crock pot. On this occasion, it was filled with Carrot Ginger Soup. I can always gauge whether the dinner left behind was a hit or not by how much of it is left when I get back home (to a completely SILENT house, on a good night). Well, let me just say there wasn’t a lick of anything left for me to even taste.

So here are the down and dirty simple steps to Crock Pot Carrot Ginger Soup.

Toss about a pound of chopped carrots, a large chopped sweet potato, one diced onion, a couple cloves of minced garlic, a bit of fresh grated ginger, a dash of garlic salt, and a bit of black pepper into your crock pot.

carrot soup

Pour some veggie broth over it all and cook on low for about 8 hours. Then pour all of the crock pot contents into the blender and blend until soup is smooth.

blender

Whisk in some light coconut milk and serve.

This is where you would have seen a picture of this beautiful soup in a nice white bowl garnished with fresh basil and accompanied by homemade garlic bread sticks and fresh cherry tomatoes with a balsamic glaze. BUT . . . I don’t know what, if anything they ate it with, and the last thing I shouted as I hurried out the door was, “Take a pretty picture of the soup for my blog” which obviously didn’t happen. The good news is, I had a wonderful evening out with a friend and discussed everything we needed to catch up on. AND I returned home to a house with all small people fast asleep.

For the full Carrot Ginger Soup Recipe, click here.

A Summer Splash of Green – Honeydew & Green Tomato Salad

Didn’t get this up in time for Memorial Day festivities (I was busy schlepping 4 kids up the California coast – all in the name of FUN), but it’s a great one for any summer picnic or potluck.

Personally, I don’t do green tomatoes that often.  Just the name, conjures up images of Kathy Bates and Jessica Tandy.  You can try to deny it, but you know exactly what I’m talking about.  The honeydew is a little bit of a stretch for me too.  I’m a definite cantaloupe gal.  Cantaloupe is my go-to summer dinner starter.  I love serving it straight up, with a little prosciutto wrapped around it for a punch of class, and with pearl mozzarella and fresh mint for a little salad combo.  Those are just a few of the players in my routine cantaloupe line-up.  But honeydew rarely catches my attention.  So the green tomato honeydew combo was a duo of underdogs in my book.

Finding good green tomatoes may be the hardest part of this recipe.  The rest of it comes together in a snap.  But the flavors are such a unique blend that it comes off tasting a lot more complicated than it really is.

I started by dicing a little jalapeno.  Yes, it will have a kick, but just the right amount , because the heat is backed down by the sweetness of the melon.

jalapeno

Then I toasted up some cumin just until it started to smell.  I sat that aside and,  in the same pan, toasted some raw pumpkin seeds until they started to pop.  I moved the pumpkin seeds to a small bowl and tossed them with a bit of olive oil.

pepitas

To make the dressing for this little number, I whisked together the toasted cumin, some white vinegar, the diced jalapeno, salt, pepper, and olive oil.

I cut up my green tomatoes (I added in a few red guys as well since I had trouble finding good green ones) and the honeydew melon.

grtoms

I tossed the tomatoes and honeydew with some cilantro leaves and the dressing, and then sprinkled with the toasted pumpkin seeds.  There was some major nose turning upping going on around the table when I served this.  Especially from the Big One, of all people.    But in the end everyone enjoyed it.

grtomsalad

I actually like the color contrast that the red tomatoes give it.  I think I will stick with that variation for future preparations.  So move over cantaloupe.   Honeydew is encroaching on your status as summer melon of choice.

Full recipe: Honeydew & Green Tomato Salad

So what’s your favorite summer salad melon?  Vote below and let me know.

I Surrender – Too Many “Gnos” to the Gnocchi

I am really blessed by the fact that all the birdies in my nest are very good eaters.  From Big One right down to the Wee One (yes, that’s from 19 years old to 21 months old – a whole lotta girliness in one house), there’s not much complaining that goes on – as far as food is concerned anyway.

For anyone who is interested, I have a few opinions about what makes a kid a “good eater”.

1) Introduce lots of food early on – one of my kiddos was eating olive tapenade at the ripe old age of 8 months.

2) Assume the best – I cringe every time I hear a parent say “Oh, s/he won’t eat that” whenever the kid is offered something new or different.  Let the kid decide.  Don’t limit their tasting experience.

3) Don’t give options – In our house one meal, and one meal alone, is served.  There’s not a “kids menu” and an “adult menu”.  You would be surprised what gets eaten when there’s not a “pizza, mac & chesse, bagel, chicken nugget, etc.” option offered in place of the main meal.

4) Let kids experience food with all their senses early on. OK, tasting is obvious, but I’m also encouraging smelling, and yes, the one most loathed by parents, touching.  I really believe that this full sensory experience of food is very connected to kids loving food.  So let your toddler eat with is/her hands and enjoy the full eating process.

5) Don’t fill them up on snacks. I know it’s “in” in some circles to consider your kid a “grazer”.  But come on, who would want to eat a Chard and Onion Torta, when they’re jammed full of gold fish, Craisins, and string cheese.  In order to enjoy eating, you have to be hungry, right?

6) Eat with your kiddo.  Seriously.  Do you like eating alone?  Well neither does your child.  So don’t fill up his/her plate and then think you have time to send that e-mail, finish that chapter in your book, or unload the dishwasher.  Sit down with your child (even if you’re not eating) and interact during the mealtime.  There are some fascinating studies out there about this, including video footage of the difference in kids’ eating quantities when parents / caregivers sit and eat with them vs. loading up their plate, serving it, and walking away.

I really could go on a lot more about this topic.  I’m passionate about it, and have definite opinions about the matter.  But I digress way too far.  What I am really here to tell you about is Gnocchi.  And in spite of all my musings about my children and their glorious eating habits, they ALL dislike gnocchi.  ALL 5 of them.  Gnocchi – a simple, bland as it gets, potato pasta.  How can can someone slurp down Curried Lentil Wraps and yet shun something like gnocchi?  I just don’t get it.  But alas, I have tried too many times and the objections remain unified and strongly stated.  So as of this posting, I will be retiring gnocchi from my menu rotation.  However, I love this sauce too much to let it go by  the wayside, so I’ll just be serving it over bowties or penne.  I hope you will enjoy it too, whether over gnocchi or some other pasta of your choosing.

Lemon Gnocchi with Peas and Spinach

Start by grating a little lemon zest which will give this sauce just the right zip.

grated lemon

Then simmer some frozen baby peas, with half and half (cream if you are feeling sassy), red pepper flakes, some garlic and salt.  You will want to cover it and let simmer until the peas are tender – usually around 5 minutes.

simmeringpeas

Then add in some baby spinach and continue cooking until the spinach is wilted. Remove from heat and stir in the lemon zest.

spinach

While all of this is going on, cook your gnocchi (or other pasta of choice). Drain and add it, along with some freshly grated parmesan, to your sauce and serve immediately.

final gnocchi

Hey, and if your kids will eat it, let me know.  I’ll have a moment of quiet jealousy!

Want the complete recipe?  Click here.

The Hubs Loves His Fish – Baked Rockfish with Tomato Caper Sauce

The hubs really loves fish of any kind.  I wasn’t as big of a fish admirer before we were married, but I guess I’ve morphed over time.  Salmon is a no brainer for me and I make a mean halibut.  Occasionally tuna sneaks onto the menu. And from time to time swordfish.  But I have to admit (after a couple of glasses of wine when I’m being brutally honest with myself), that there is still some intimidation factor for me when it comes to preparing fish.  I can’t put my finger on it, but I think it has to do with feeling that fish requires a much more precise cooking time.  And let’s face it, when fish is gross, it’s just plain gross and there’s not much that came be done to gussy it up.

That’s why I love this recipe that I came across recently.  It was written forsSole and the sauce also contained fennel.  I make it with rockfish, because that’s what my Costco has in stock quite regularly and it’s REALLY reasonably priced. I have made the sauce with fennel and it is lovely that way.  But if you’re like me, you probably don’t just have a fennel bulb kicking around in the fridge.  So I love this recipe in its modified format for  2 reasons: 1) it’s baked and my fish  intimidation factor gets knocked down a notch 2) it contains stuff that I normally have on hand.

So I start by  just chopping an onion and sauteeing it in some olive oil.  I add a little garlic once the onion starts to turn golden.  Then I add a can of diced tomatoes and their juices along with some white wine.  Finally, I throw in some capers and season with some salt and pepper.  I tame the capers a bit by rinsing them well before adding them.  Otherwise their taste can be a bit overpowering and the little palates of the house aren’t exactly caper fans in their un-rinsed state.

fish tom sauce

capers

If you wish to do the fennel version of the sauce, you can just sautee the fennel right along with the onion.

After the sauce is done, transfer it to the bottom of a shallow, wide baking dish.  I use the old 9×13 casserole dish.

Then take your fish filets and roll them.  Place them on top of the sauce.  To finish things off, mix together some dry bread crumbs, softened butter and salt and pepper.  Place a nice dollop of this breadcrumb mixture right in the center of each fish roll.

fish before baking

Now sprinkle a couple of tablespoons of white wine around the fish (not on it) and into the sauce. Bake the whole thing at 425 degrees for about 25 minutes.

cooked fish

Recipe adapted from Epicurious.

For the full recipe, click here.